Advice and answers from the GetReviews.ai team
Zapier
Automatically send new reviews to any platform with the Zapier integration.
On GetReviews
Create an API Key
- Use the Account Picker to select the GetReviews account you want to connect to Zapier.
- Visit the Integrations Library
- Locate the Zapier integration and click "Configure"
- Tick the "Enabled" checkbox
- Select a "Dispatch mode"
- Copy the API Key generated in the text box. Each GetReviews account has its own API Key, so make sure you copied the key from the same account you want to connect in Zapier.
- Click "Save"
- Click the "Connect Zapier here" link (opens in a new tab)
On Zapier
Connect to GetReviews
-
Navigate to the new (Zapier) tab opened above and accept the GetReviews invitation

GetReviews integration on Zapier -
Create a new Zap, then click the Trigger step
Begin creating a Zap 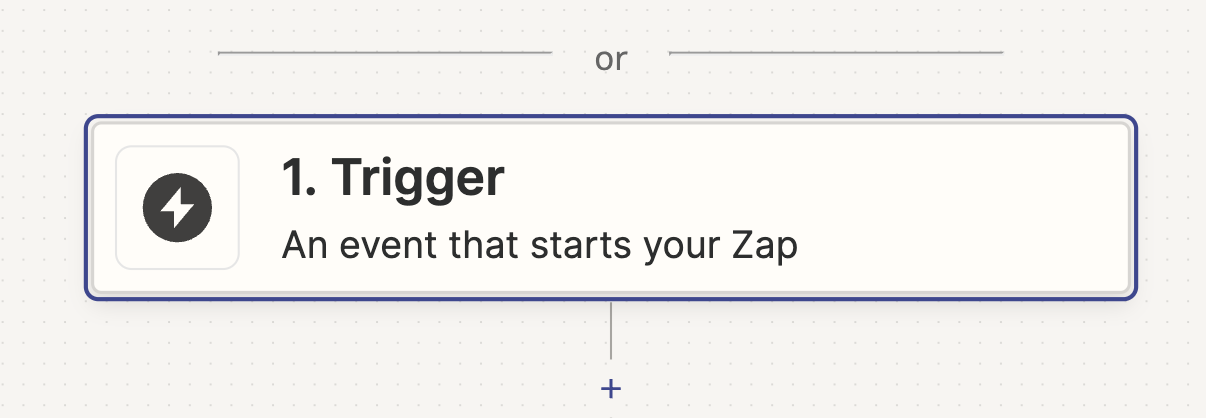
Select the Trigger step -
Search for "GetReviews" and click to connect
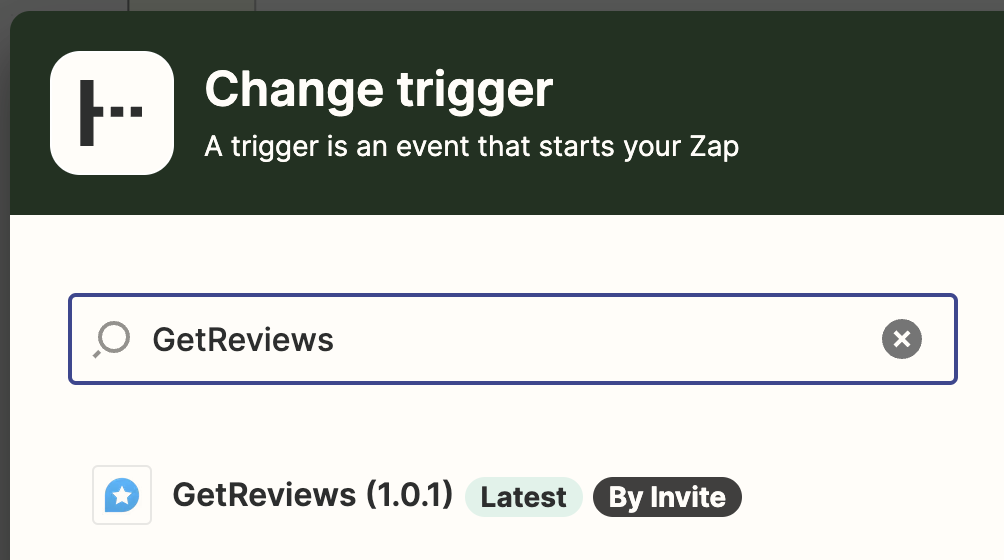
Find the GetReviews trigger -
Open the "Event" dropdown and select "New Review"
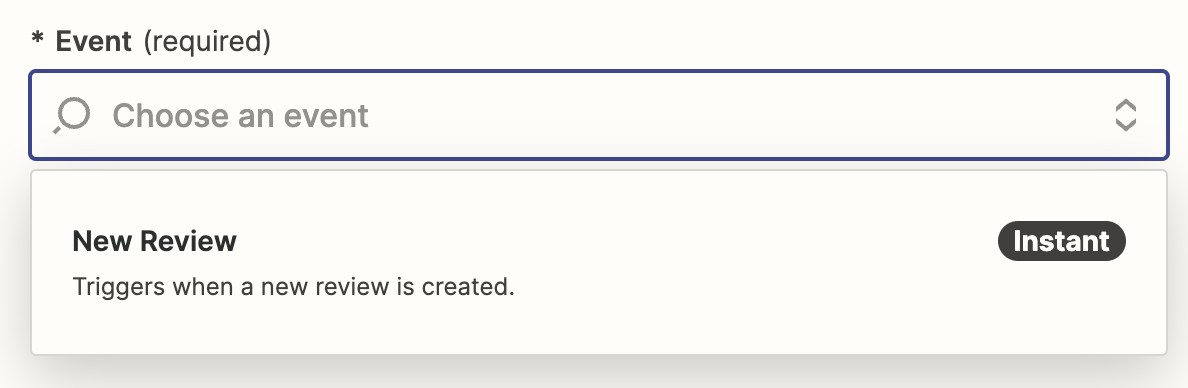
Zapier trigger dropdown - Click to continue, then click the "Sign in" button to connect GetReviews
-
Paste the "API Key" from inside the same GetReviews account you selected in the previous set of instructions above
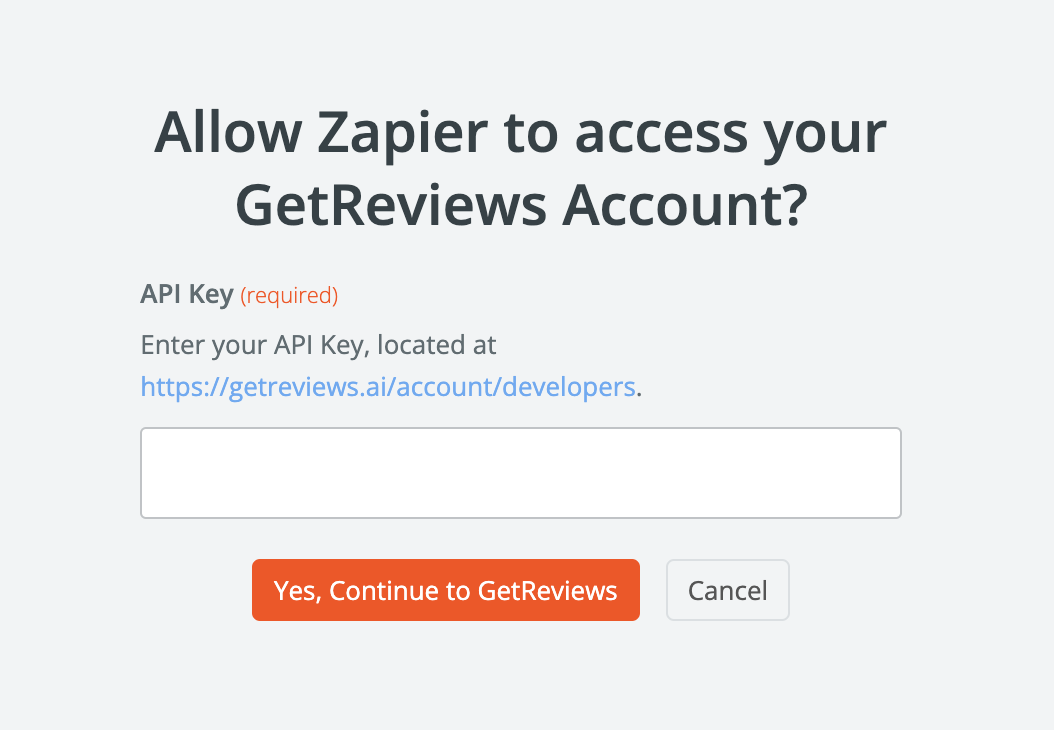
Provide your GetReviews API Key to Zapier -
On the resulting page, click Continue and then select 1 or more of your Surveys from the Trigger > Survey dropdown.
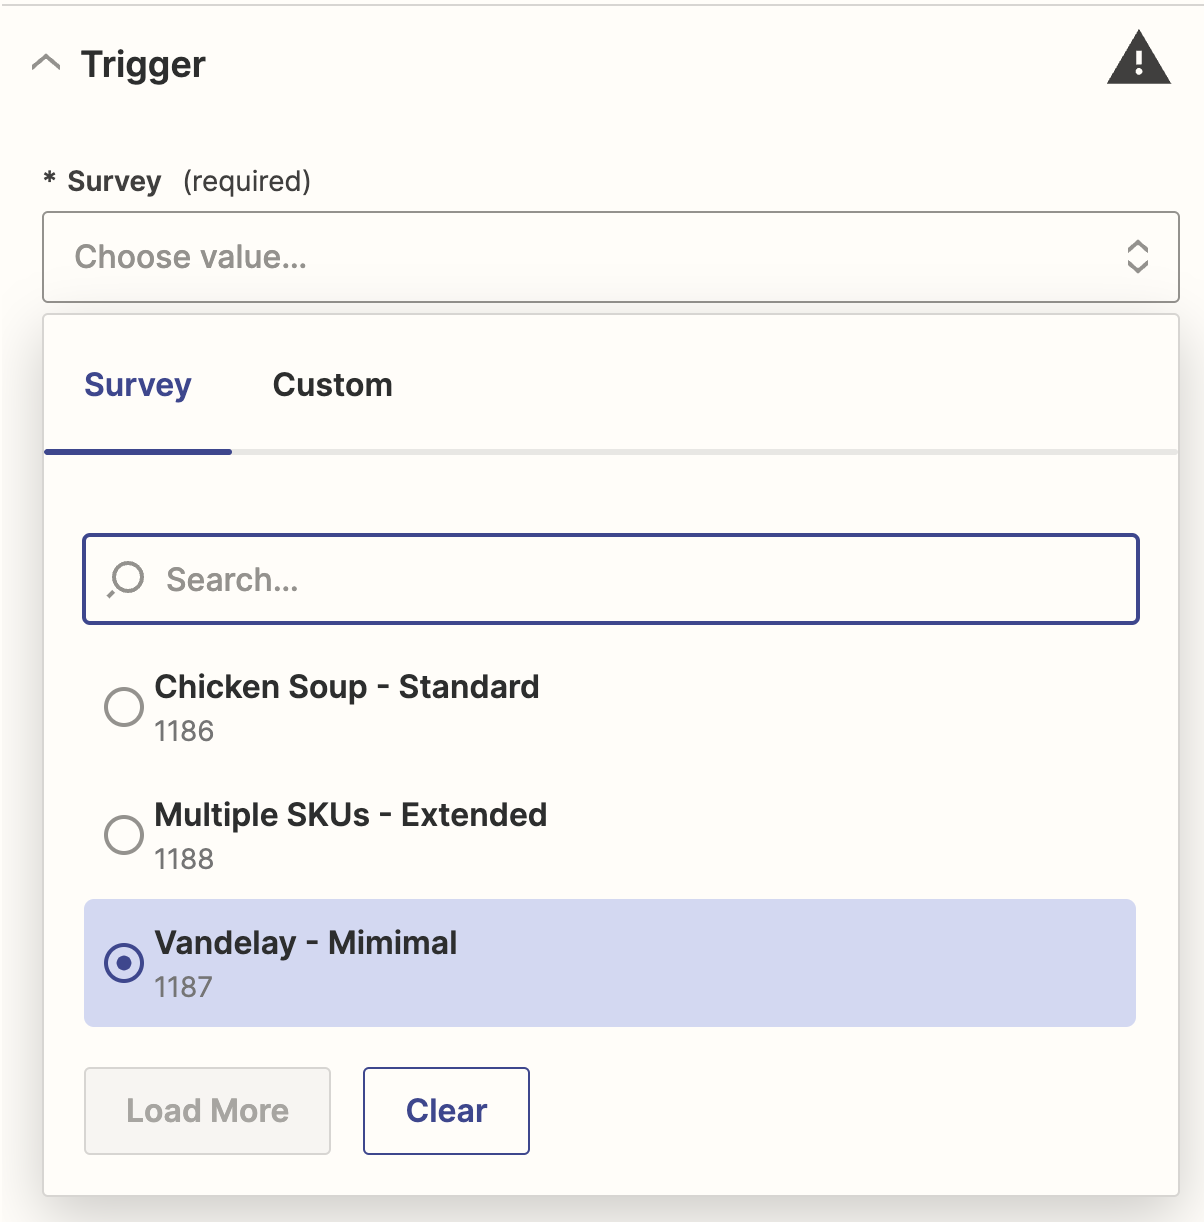
Connect unlimited Surveys to a single Zap. -
Click to Continue, then click “Test Trigger" to pull in sample Reviews from your account. After selecting a sample record, continue again to choose an Action (where you'll send GetReviews review data).
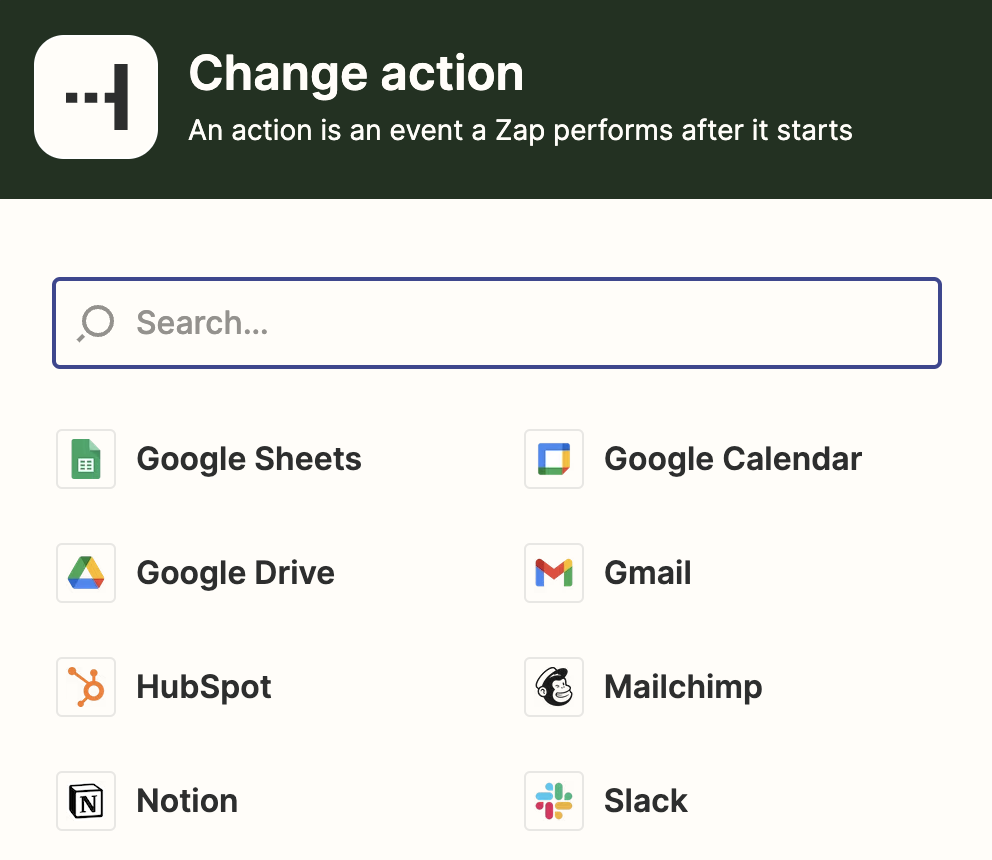
Choose from 6,000+ destination applications -
After connecting an Action, map over more than a dozen Review fields including first_name, email, product name, marketing opt-in status, and many more.
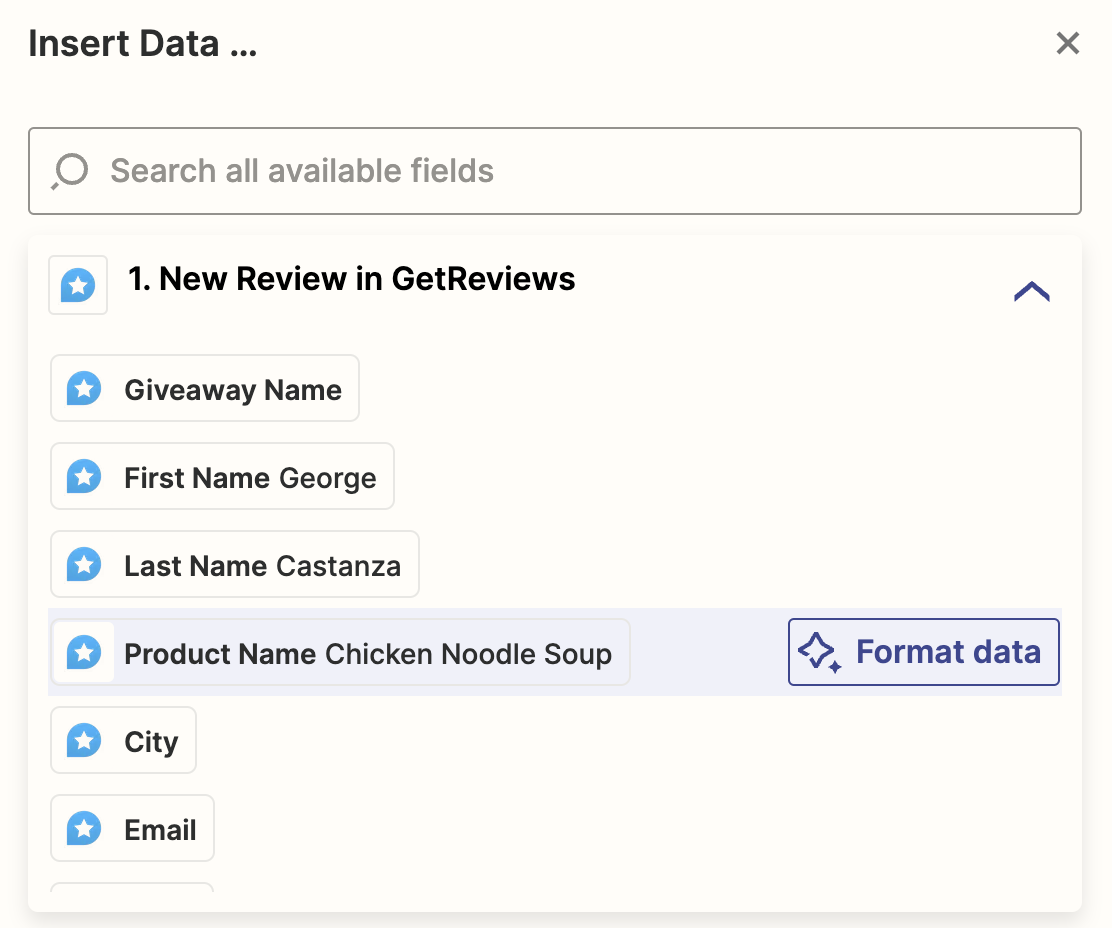
Map review data to any application
You're now done with the technical aspects of our Zapier integration, so it's time to go live!
On GetReviews
Inside your Zap, you may have selected 1 or more Surveys.
- Visit each survey that you enabled from Zapier.com
-
Click to edit, then scroll to the Integrations section and tick 'Zapier'. You may have 1 or more other integrations also enabled or disabled at this step.

Enable survey triggers inside GetReviews - You're done!
New reviews will now trigger your Zap, sending the data you mapped over (Step 9 above) to your destination "Action" application.
Just remember that the timing of this review data being sent to Zapier will depend on your Zapier > Dispatch mode settings.