Advice and answers from the GetReviews.ai team
Manual Validation
Unlike automatic validation, manual validation does not reference a database to validate customer-submitted order numbers. With manual validation, customer-submitted order numbers are validated by a human. With manual validation enabled, when a customer submits their order number into your survey, so long as the customer's order number format matches the marketplace's order number format, then they are allowed into your survey to leave their review and claim their giveaway. However, unlike automatic validation, manual validation places reviews into a pending state, meaning that no integrations are fired until you have verified the legitimacy of the submitted order number and have hit the "Validate" button on their review. Let's go over the process to enable manual validation and learn how to manually validate a review.
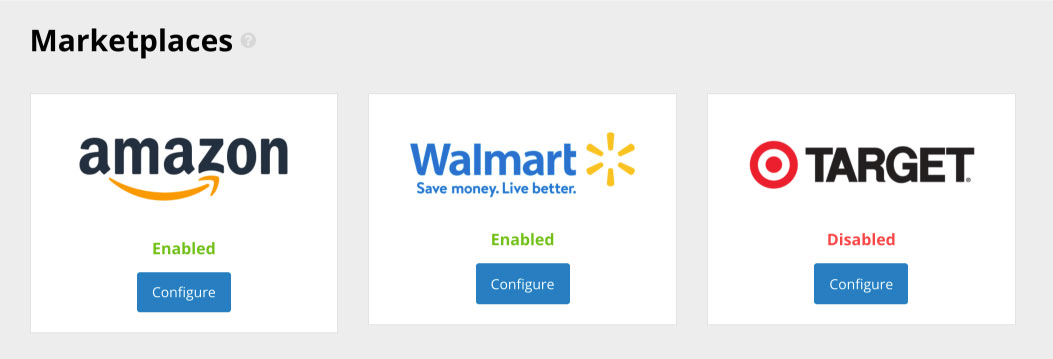
Enable a Marketplace
The first thing you will need to do to enable manual validation is to enable a marketplace. A "Marketplace" is where your customer's order number was generated. For example, if your customer purchased your product on Amazon, then an Amazon order number (with all of it's unique formats and characteristics) was generated. To enable a marketplace, visit your
Marketplace Library
.

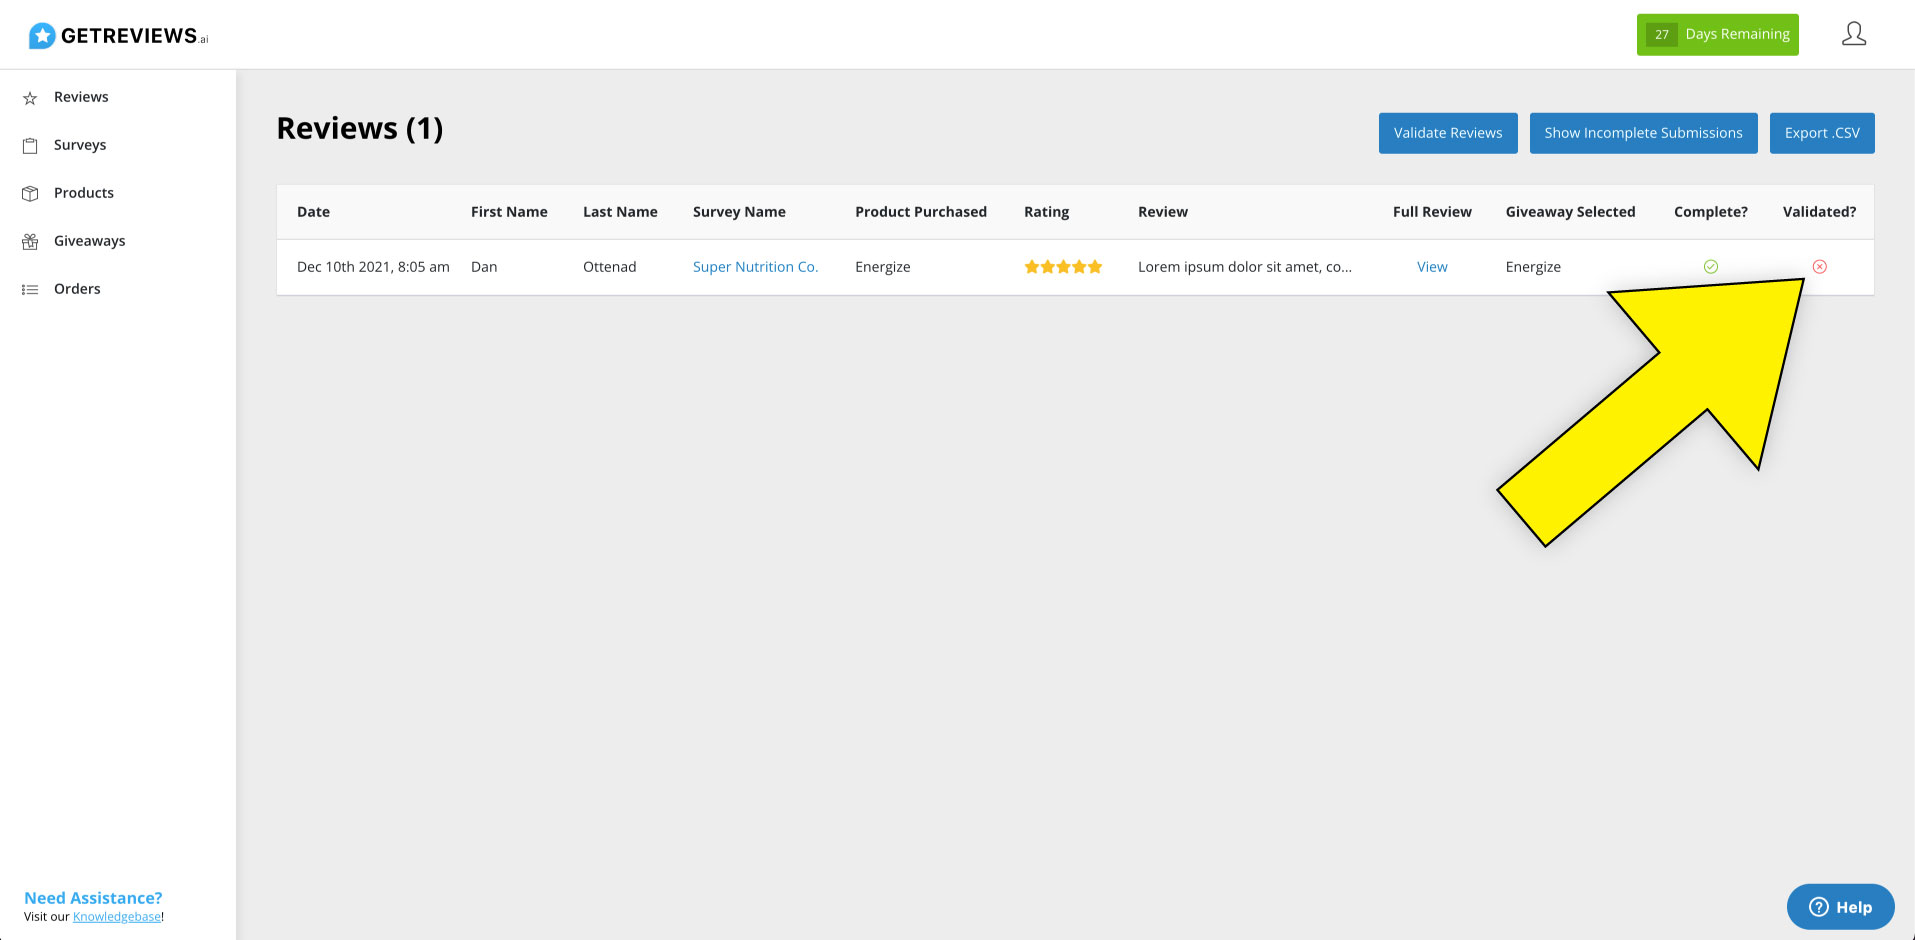
Validating Reviews
When a customer submits a review on a marketplace with manual validation enabled, their review is added to the list of reviews on the reviews page. You can quickly check to see the review's validation status via the "Validated?" column on the far right hand side of the screen.
To validate a review, you have two options. (1) Bulk validate reviews in the Validation Center, or (2) Validate reviews by viewing and validating each review individually. Let's go over how both of these work.
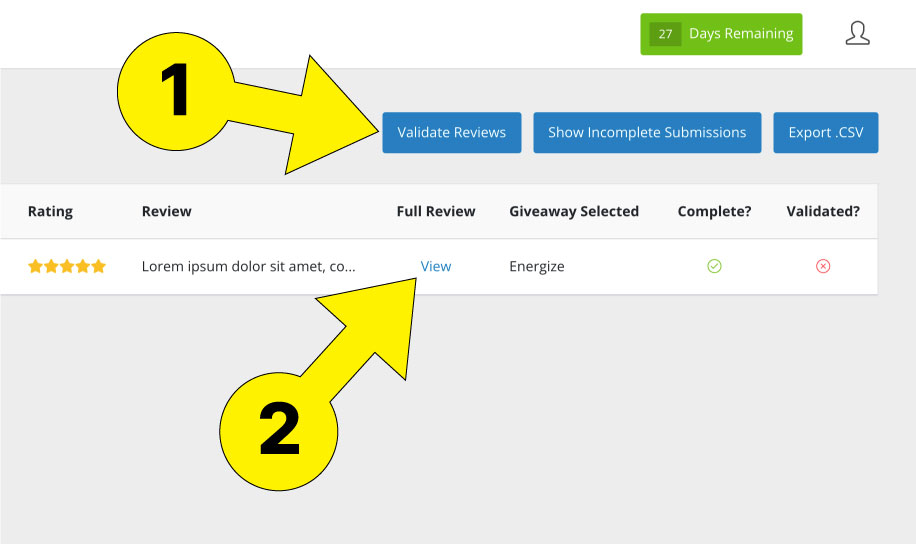
Validation Center
The validation center allows you to more quickly validate reviews. Let's go over how to validate reviews in the validation center.
To validate a review in the validation center, first visit the Validation Center . Here you are shown some basic data about the customer's review, including name, date, product purchased, marketplace, link to full review, & order number. Once you have verified that the customer's order number is legitimate, you'll want to click the big green "Verify" button on the far right of your screen.
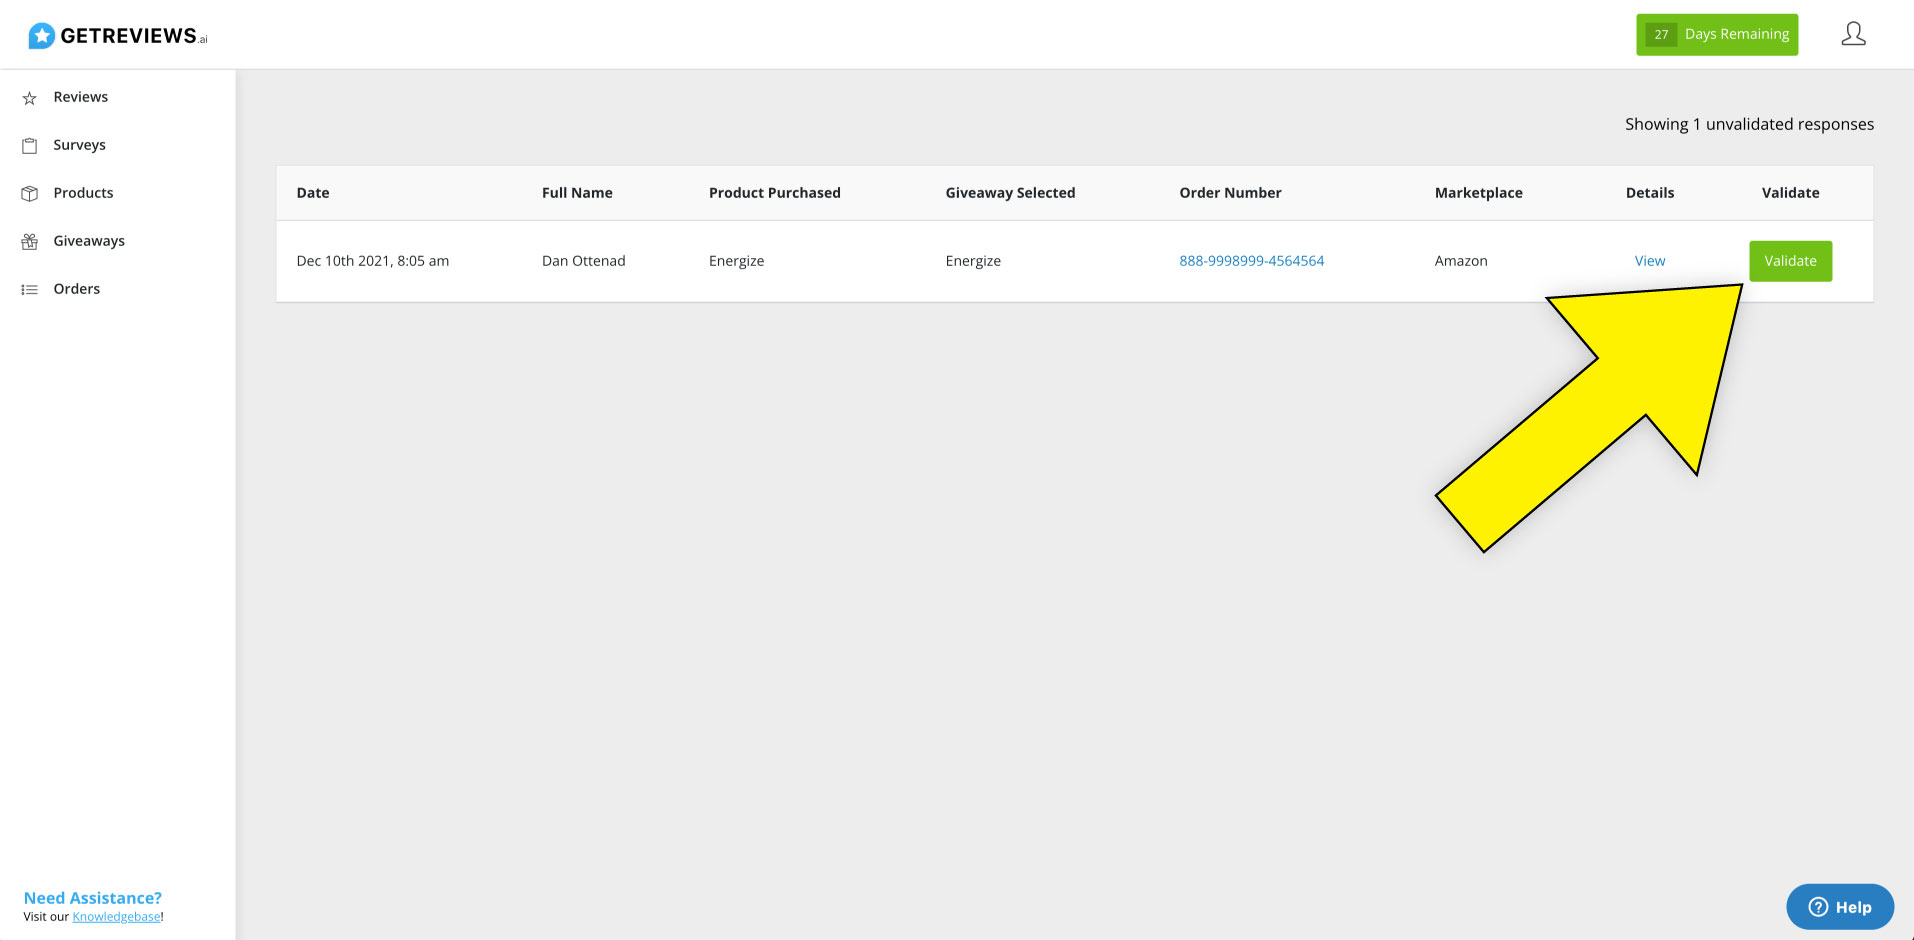
Once you click "Validate," you will be shown a prompt asking you to confirm your decision to validate this review. GetReviews asks this because once a review is validated, it cannot be invalidated. Once a review is validated, all integrations associated with the survey that this review was submitted to will fire, so be sure this is a legitimate order before you mark it as valid.
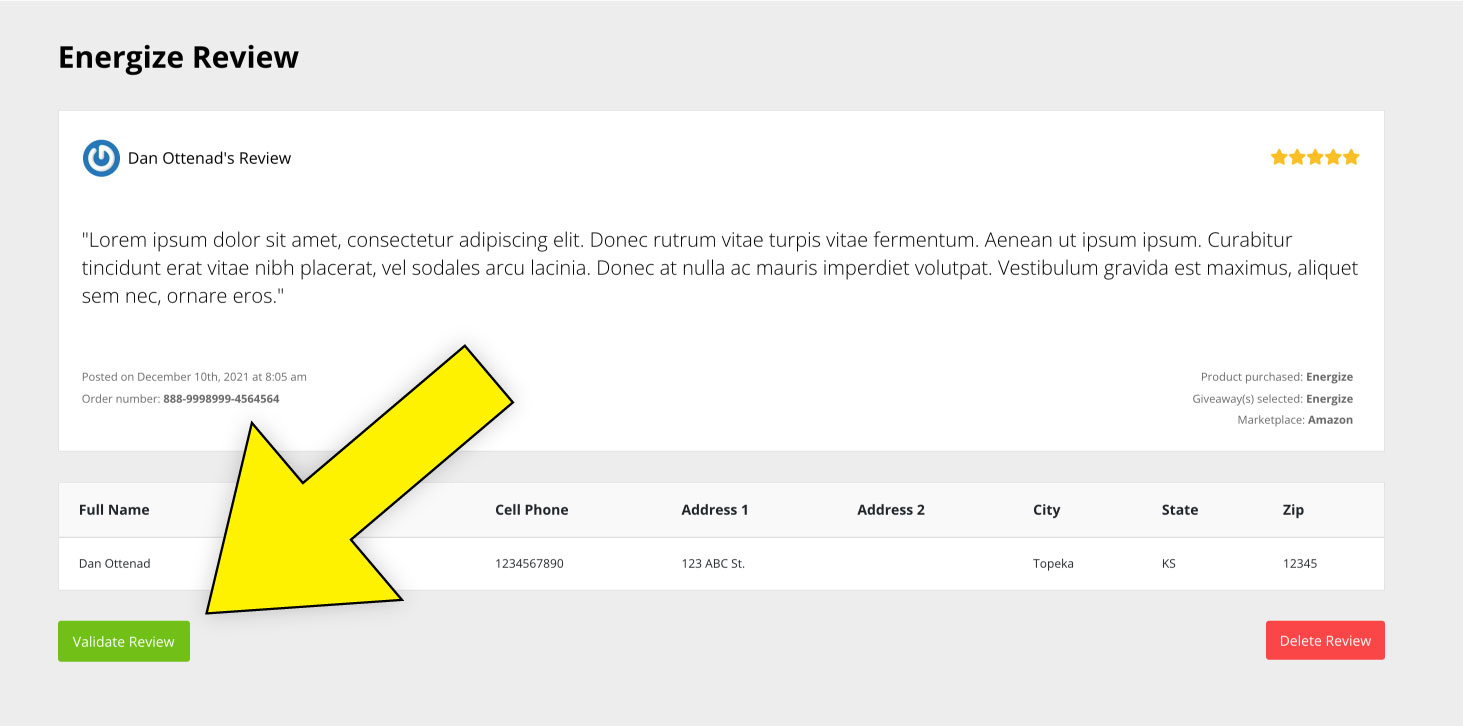
Individual Review
You can also validate a review by visiting the detail page of an individual review. Once you have clicked into the detail page of an individual review, notice the big green "Validate Review" button in the bottom left hand corner. Pressing this button does the same thing as pressing the Validate button in the validation center, it validates this review and fires all integrations associated with the survey that this review was left on.