Advice and answers from the GetReviews.ai team
Klaviyo
Instructions to automatically sync GetReviews survey responses with Klaviyo.
On Klaviyo:
Create a Private API key
The API key is what allows GetReviews to send respondent data to your Klaviyo account.
- Log in to your Klaviyo account.
- Visit Account > API keys and click the "Create Private API Key" button.
- Name your key "GetReviews", then select the "Custom Key" access level. On the right side set "List" and "Profiles" and "Subscriptions" to "Full Access." These permissions are required to create profiles, subscribe them to marketing channels, and attach them to lists.
- Click "Create" in the top right corner. Copy your API key from the middle section. It should look like this: pk_257d2eeaeb5284dazzzba5211270a81e451
Copy your Klaviyo List ID
The List ID is where you would like GetReviews to send your respondent data to.
- View your Lists
- Locate the list you would like to send respondent data to, or create a new GetReviews exclusive list.
- Click the ⋮ (3 dots) icon on the right side of the list and then click "List Settings"
- Click the 'Consent' tab on the left side and ensure the "Opt-in process" is set to Single opt-in. If this list is used elsewhere and you prefer double opt-in, we suggest making a new list exclusively for GetReviews. Then set up a Klaviyo automation that copies profiles from this GetReviews list to your master Klaviyo lists/automations upon entry.
-
Finally, click the the 'List details' tab on the left side. Your list's ID will be near the top of this screen (see image below)
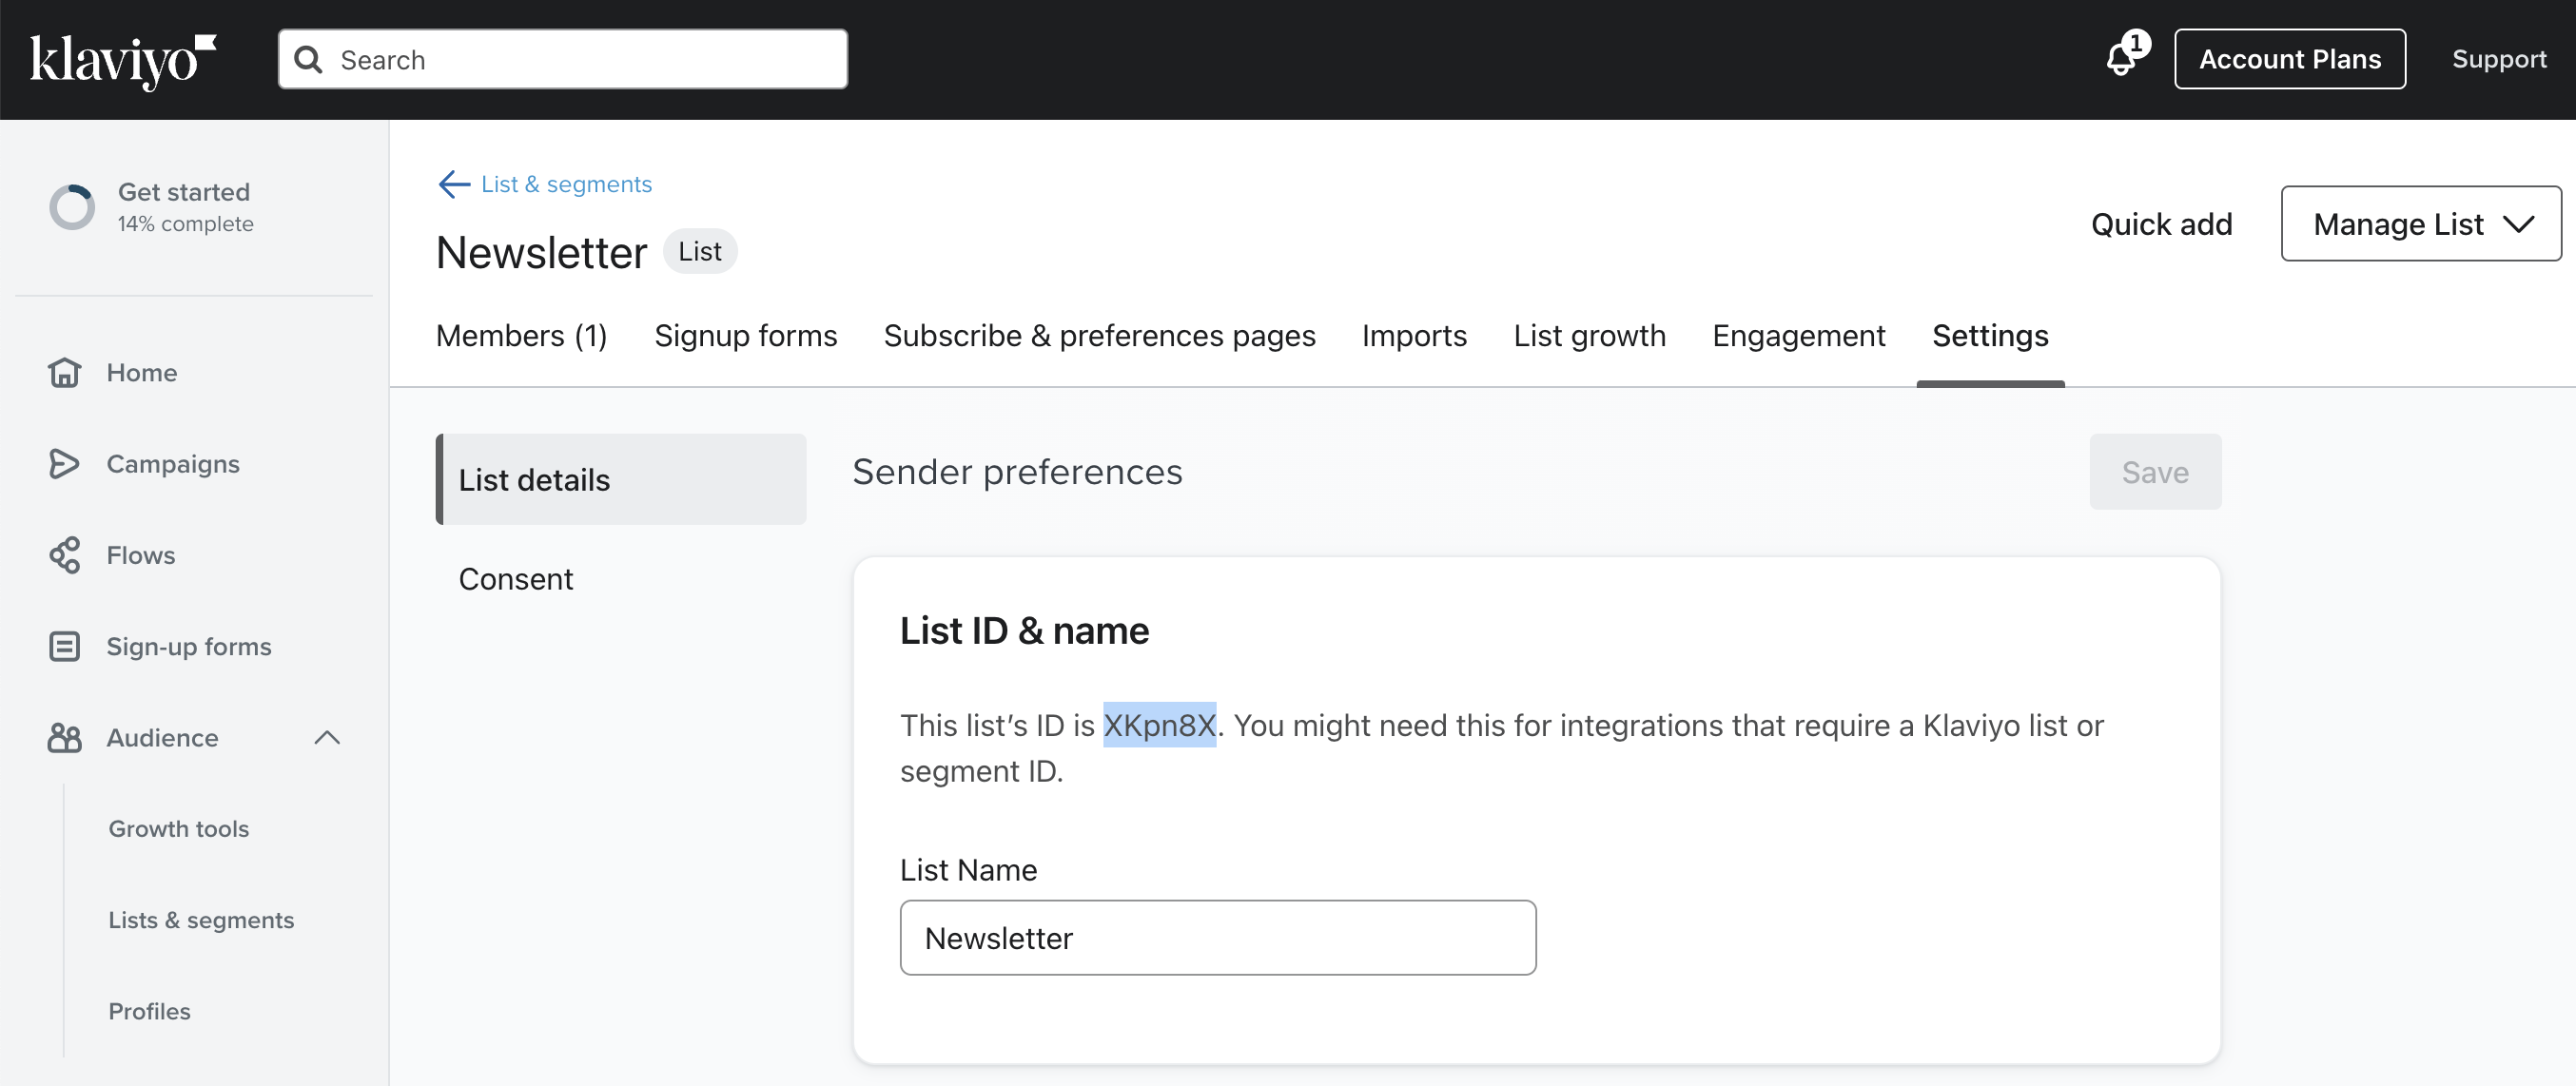
Finding your Klaviyo List ID
On GetReviews:
Paste Klaviyo API Key
- Visit the Integrations Library
- Locate the Klaviyo integration and click "Configure"
- Tick the "Enabled" checkbox
- In the API Key text box, paste the API key generated from Klaviyo
- Leave the "Extra attributes to include" text box empty if you only need the first/last name, email, and location of your reviewer. A full list of attributes is here.
- Choose a Dispatch Mode (immediate or after validation)
- Click "Save"
Paste Klaviyo List ID
- Visit the Surveys page
- Next to the survey you would like to export respondent data to Klaviyo from, click “Edit”
- Scroll down to the "Integrations" section
- Enable Klaviyo as an integration
- Paste the List ID
- Click "Save"
Once all of the above steps are complete, when a customer completes your survey, their data will be automatically sent to the Klaviyo list you've defined above.
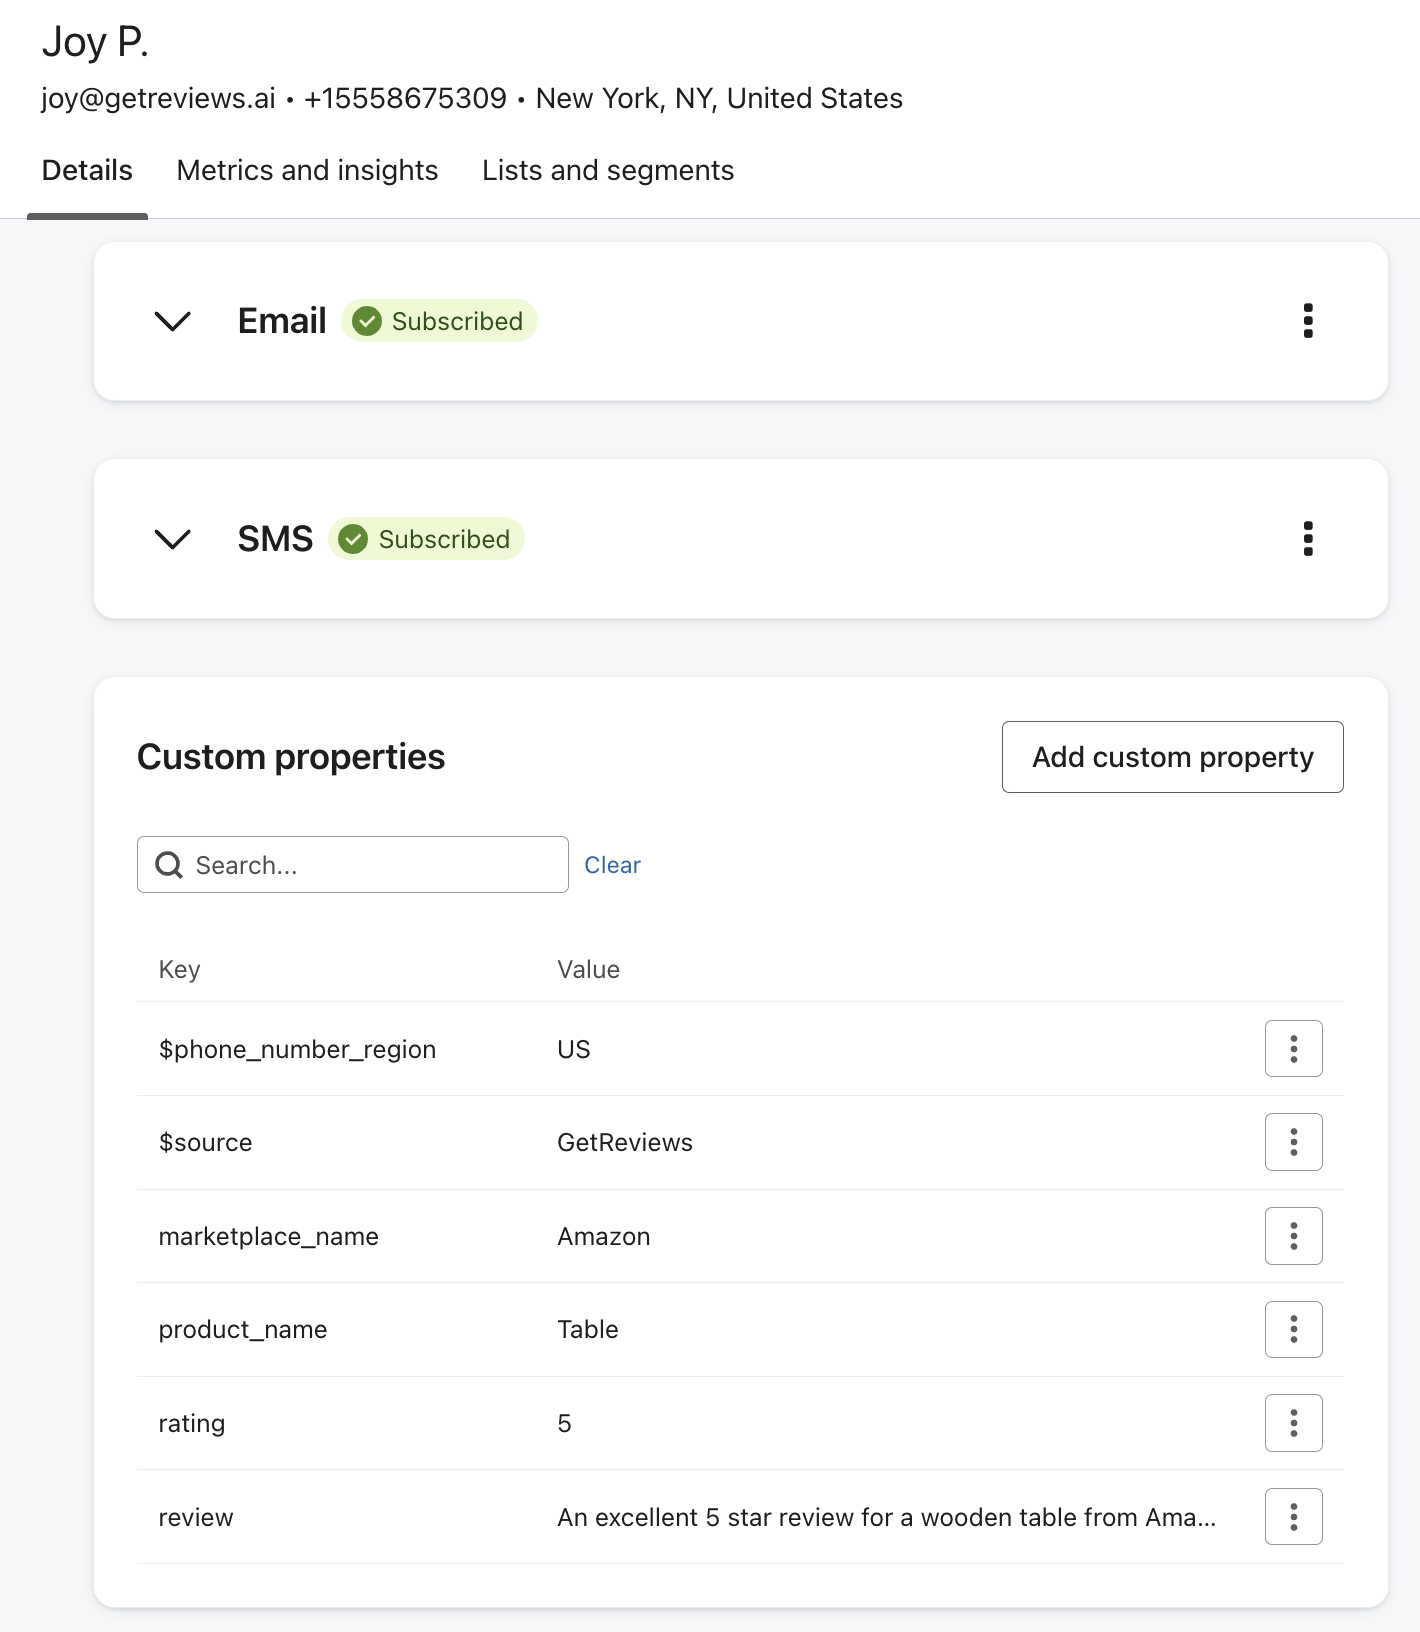
To simplify the creation of GetReviews-specific automations inside Klaviyo (beyond the list scoping steps above), as of March 17 2024 we also add a custom "$source" property of "GetReviews" on each created profile.
Extra Attributes
The following attributes may be comma-separated in the 'Extra attributes to include' text box to expand the dataset we send to your Klaviyo list.
- marketing_opt_in (true/false)
- rating (ex: 5)
- review (ex: This product rocks!)
- product.name (ex: Super Pills)
- product.asin
- giveaway.name
- giveaway.sku
- marketplace.name (ex: Petco, Amazon.co.uk)
- marketplace.keyname (ex: petco, amazon_uk)
Putting all this together, if you'd like to send a reviewer's first name, last name, email, city, marketplace, and product SKU to Klaviyo you can input this into the 'Extra attributes to include' text box inside GetReviews > Integrations > Klaviyo:
marketplace.name,product.asin(first name, last name, email, phone number, and city are already included by default)